Wilderness Watch!
Wilderness Watch!
Student teams will be introduced to a method of capturing and interpreting data about local wildlife. Students will observe their surroundings and make connections between resources and animal populations. At the end of this lesson students will be able to make conclusions about their local environment using data gathered from a 3D printed camera trap and a smartphone.
Downloads:
Instructions for Teachers
Student Worksheet
Camera Trap Case*
Camera Trap Stand*
*3D models can be viewed when imported into your 3D printer design software.
Download instructions for teachers
Spanish translations for the Smithsonian Science for Makerspaces challenges are made possible by a grant from the Smithsonian Women’s Committee.
Next Generation Science Standards
3-5-ETS1-2 Generate and compare multiple possible solutions to a problem based on how well each is likely to meet the criteria and constraints of the problem.
3-5-ETS1-3 Plan and carry out fair tests in which variables are controlled and failure points are considered, to identify aspects of a model or prototype that can be improved.
Teacher will share the following passage with students
Have you ever seen any wild animals living around our community? Do you know if those animals have a big population or a small population in our area? Are they common or rare to see? Scientists like to study animals that live around towns and cities to see if they can live healthy lives around people. One of the best ways to tell if an animal species is doing well is by counting its numbers. These scientists use a technology called a camera trap to help look for animals. A camera trap is like a security camera. When the device senses movement from an animal walking by, it will take a picture. Scientists can make conclusions about animals they find in those images. What animals do you think you would see if you put up a camera trap around your house?
eMammal/Smithsonian BioAcoustic Monitorin Project
Click here to open the image in a new window
eMammal/Smithsonian BioAcoustic Monitorin Project
Click here to open image in new window
Smithsonian Connections
For additional examples of the exciting animals seen through the lens of a camera trap, visit eMammal: emammal.si.edu
Makerspace Technology and Materials
- 3D printer with filament
- 3D printer design software
- USB drive
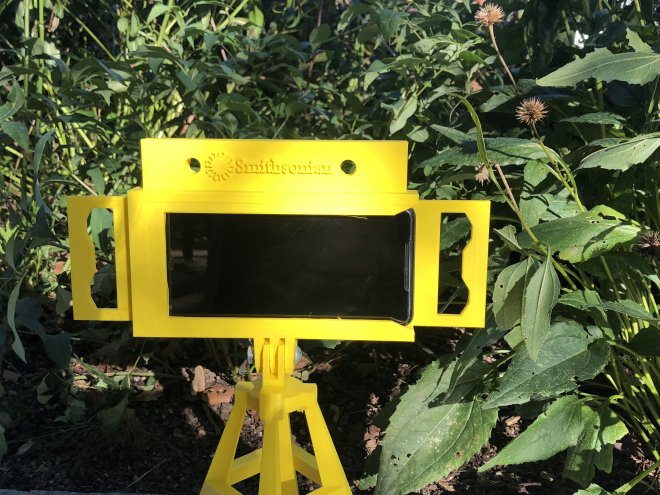
Teacher will print off the Camera Trap Kit for each student group
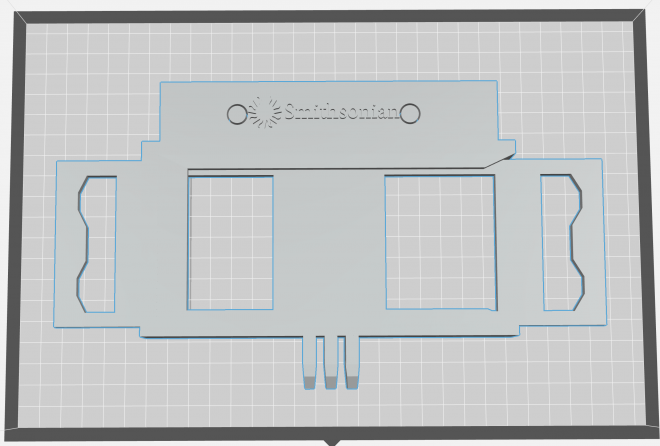
Click to download the Camera Trap Phone Case model
Smithsonian Camera Trap Phone Case dimensions: 10¼ x 6 x ½ inches
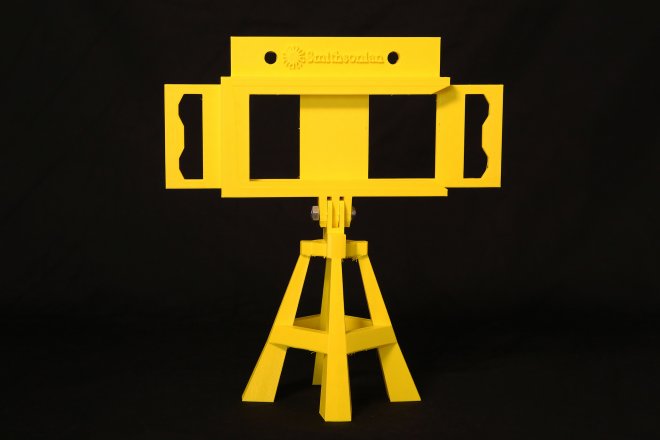
Click to download the Camera Trap Stand model
Smithsonian Camera Trap Stand dimensions: 5 x 5 x 6½ inches
Steps to Print
- Download the Camera Trap Phone Case Model STL file.
- Download the Camera Trap Stand Model STL file.
- Open your 3D printer design software.
- Start a new project and Import the Camera Trap Phone Case Model and the Camera Trap Stand Model.
- Optional: Scale and Rotate the models as needed.
- Optional: Apply printing supports as needed.
- Export and Open the project on your 3D printer. This may require a USB drive if your printer is not hooked up to your computer.
- Print the models.
Approximate about 12 hours of printing time for each Camera Trap Phone Case Model.
Approximate about 12 hours of printing time for each Camera Trap Stand Model.
Additional Materials for Each Student Group
- 1½-inch screw and bolt to connect Camera Trap Phone Case to the Camera Trap Stand
- Resources for hanging the camera trap
- Rope
- Bungee cords
- Hammer and nails
- Other items to hang the camera trap
- Smartphone device with Wi-Fi access
Notes on Software: Teachers will be able to use a variety of software and applications for this lesson. We recommend searching for software using the following terms to help you choose the best fit for your class: Online Video Streaming Software, Time Lapse Photography Application, Motion Sensitive Applications, Video Recorder.
Notes on Camera Trap Case: Make sure the location used for the camera trap activity is secure and dry. The Camera Trap Case is not waterproof. The Camera Trap Case is designed for large screen smartphones. This model can be resized in your 3D printer design software if needed.
Students will be able to assess their local environment and point out where animals get their resources
Teacher will give each student group a Wilderness Watch worksheet
The Design It! stage is separated into two sections. In Part 1, the teacher will lead a class discussion giving students an opportunity to list various animal species they have seen in their local community. Students will select one animal from the class list and add details about the animal, including its diet and shelter preferences. In Part 2, the teacher will take the students outside to a location where animals are known to visit. Students will select a location to set up their camera trap. They will sketch their camera trap setup.
Design It! Part 1
- Teacher will ask, “What animals have you seen around your community?”
- Teacher will write the names of each animal on the board.
- Students will choose one of the animals from the board and will sketch the animal and list what resources would attract that animal.
Design It! Part 2
- Teacher will take the class outside to a location where animals often visit.
- Student groups will search for the best location for their camera trap, looking for animal resources.
- Student groups will agree on a location and sketch their camera trap setup. Teacher will ask, “What materials will you need for the camera trap? Rope, hammer and nails? What angle does the camera trap need to be set at to observe the best location?”
- Students will set up their camera trap and recording software, with assistance from the teacher.
Students will observe wildlife behaviors and make conclusions about the location surrounding the camera trap
The Test It! stage is separated into two sections. In Part 1, students will review the footage taken from the camera trap. Students will record and number the wildlife they observed and what animal behaviors they witnessed. In Part 2, students will make conclusions about the camera trap location and why it attracts certain types of animals.
Test It! Part 1
- Students will collect their camera trap and smartphone.
- With teacher assistance, students will download and review the images taken with the camera trap.
- Students will list the names of the animals seen in their footage, along with details of animal behaviors.
- Students will share results of their Part 1 activity with the class.
Test It! Part 2
- Teacher will list on the board the animals seen by the class.
- Teacher will ask, “What can we tell about this area because we saw these types of animals? What are the resources in this area for these animals? What makes it an attractive place for them?”
- Students will complete Part 2, and list conclusions they have developed about the camera trap location.
- Students will share their conclusions with the class.
Assessment Questions
What can camera traps tell us about animal populations?
How can technology help us study animals?
What are the important resources animals need to live in the area?